Machinery Installation: Are You Keeping Pace with Technology?
Not all millwright (construction) and maintenance industries have kept up with today’s machinery installation technologies.
When we think about machinery installation, most tradesmen think of alignment, actually, shaft alignment. The reason for this is because it is usually the most difficult part of the process. It doesn’t have to be but basically, because of inadequate training, even tradesmen who have laser systems are not comfortable with the process and it can still be a hit and miss affair. This is understandable because in many cases, they were shown by the instrument salesman which buttons to push and the rest is up to him! Many companies have laser systems but do not use or even know of their instruments full capabilities!
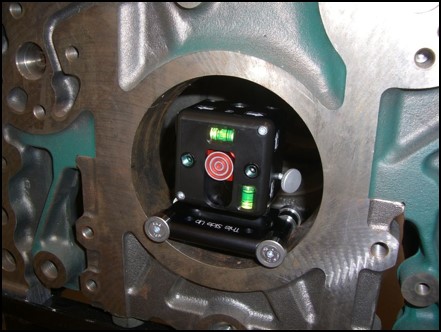
Crankshaft bearing journal measurement of a small diesel engine.
For example: a shaft alignment tool that can measure the horizontal and vertical offset of the bore/bearing journals of an engine, but if the journal is wide enough, can also measure the angle. We like to say that laser measurement is limited to your imagination. Well one thing that stimulates imagination is to know the capabilities of what you have. Now you may not need to measure the journals of a diesel engine but you may have to measure the straightness of a particular item in your work processes and all this is, is a simple straightness measurement.
With shaft alignment, usually you have to rotate the shaft. Some shaft alignment tools need as little as 40 degrees of rotation. Others allow you to measure while the shafts are rotated but this is not as great a benefit to you as you may think. Ask yourself, do you have a better shot at hitting a moving target or a stationary one? Moreover, if you have to rotate the shaft, you have to be applying torque. This means that you can be moving the shaft off the centre of rotation. It’s worth thinking about. You have to be sure what is a benefit and what is not. In most cases you should always measure at the 9, 12 and 3 clock positions with the shaft stationary when the measurements are taken if you want a more repeatable measurement. However, you are not limited to this. You can actually measure the alignment of shaft without turning the shaft at all. This is a great benefit if you have shafts that are difficult to rotate.
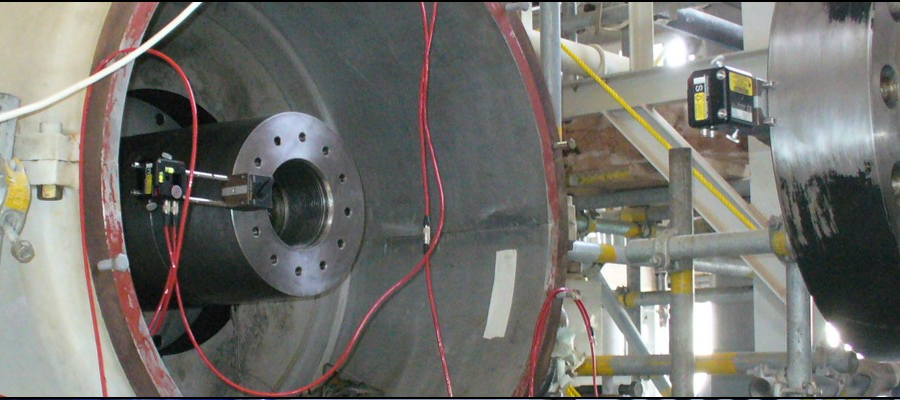
Alignment of non-rotating shaft
Large bucket elevators come to mind. The weight of the buckets and belts etc. make it impossible to turn. Another is a large turbine shaft that rests on a film of oil. This means that the oil has to be pumped up in order to jack up the shaft before rotation. Not impossible, but very time consuming. It means locks have to be removed then put back on again. Other applications are large shafts at hydro dams. The best way to align this is to use a dual beam laser system. You mount the laser heads at the 9 o’clock position and zero them. You can then take a series of measurements at nine, twelve and three. After you have established consistent measurement results you can then use a shaft alignment program for your final result.
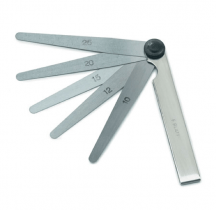 In order to make my point, earlier this year, one of my customers asked me to talk to one of the service men who were attempting to measure the shaft alignment of a turbine using a feeler gauge. I asked him why he would use a feeler when a laser system was available. He explained that he had had difficulties using a laser in the past and was more comfortable using the sixteen point feeler gauge method and that he had always done it this way.
The sixteen point method is a method where you take a set of measurements with feelers at the 12, 3, 6 and 9 0’clock position. You then rotate the shaft 90 degrees and re-measure for a total of four rotations and sixteen measurements. After which you use the average results to calculate the correction which all takes a lot of time. I’m sure that this gentleman is a very competent service provider, but I find it hard to agree that this method of alignment can compete with a modern day laser for accuracy or speed with an end result that is documented and repeatable. Using a feeler gauge is based on an individuals touch or hand sensitivity and you cannot document that.
However, there is a lot more to machinery installation than simple shaft alignment. We have to be able to measure straightness, flatness, square, parallel, etc. Millwright and construction companies have a slew of instruments for doing this work many of which are rented and are not treated with the respect that they ought to be given.
The accuracy of these instruments is based on the adjustment of the spirit level which should be done at the job site after being transported there. The instrument should also be checked for repeatability and verified by using two operators. With modern laser systems you don’t have to spend all that time with set up. You simply take your measurements and then set your reference point electronically in the display or in the PC later, and again you can document the results. The point that I’m making is that many companies are still using old technology. For instance, piano wire which is inaccurate because it sags and kinks and takes a long time to setup.
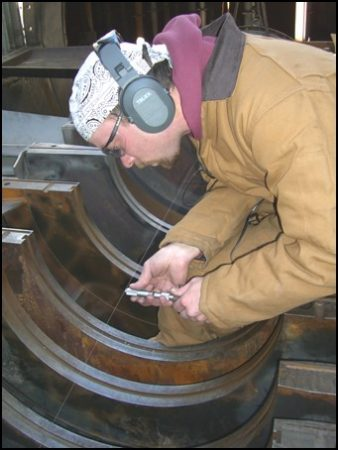 One service company was going to use a tight wire or Piano wire set up to measure the plumb line measurement of a large (30 foot) vertical shaft. To do this they set up four wires and measured from the shaft to the wires before making a calculation on the measurement results. Now this process will take about three days. A laser system will do this work in less than one day.
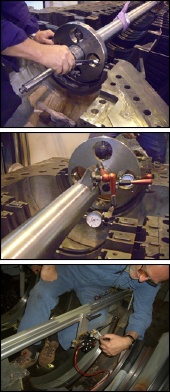 The picture (left) shows a tradesman measuring the diaphragms of a turbine using an electronic micrometer. He is measuring from the piano wire to the side of the diaphragm basically by hand and using his senses. Another way of doing this type of work is by using a mandrel.
A mandrel (right) is a shaft that has two mounting plates at either end. These plates are mounted and adjusted so that the shaft is in the centre of the turbine. A dial indicator is attached to the shaft and the shaft is rotated taking a reading of the seal. This, like the piano wire, takes hours or even days to set up but more importantly, it’s not as accurate as many people think.
One of the processes that has moved ahead in leaps and bonds is the alignment of turbines, including the diaphragms. This is the same with the wire, mandrel and laser beam. The difference is that the laser is much faster in set up and in the actual measurement process. It also gives you a more accurate, repeatable, quantifiable measurement result that can be documented.
About Author


0 comments
Write a comment